
In this tutorial, we will create an animated photo reveal effect in Adobe Photoshop for Instagram stories, which can be used with any image.
I created the animation for Animated Creative Portrait Reveal Stories Template the same way for my GraphicRiver portfolio.


Tutorial Assets
- Any photo you want to use for this manipulation. You can find some free photos on Unsplash and Pixabay or buy high-quality photos on PhotoDune. I chose this photo from Unsplash.
- A set of free brushes created by me specifically for this tutorial.
1. How to Prepare the Document
Step 1
Use Control-N to create a new document and use the following settings: 1080 x 1920 px; 300 dpi.


Step 2
Go to File > Place and put your image inside the document.


Step 3
Resize your image to the borders of the document and click Enter.


Step 4
Right-Click on the layer, and then click Convert to Smart Object.


Step 5
Create a new group below your smart object in the Layers panel using the Group Layer Icon, and rename it "Mask Layers".


Step 6
Select the group of layers and create nine new layers using the Shift-Control-N combination.


2. How to Create a Painting Effect
Step 1
Select your smart object layer and go to Filter > Noise > Median. Use the following settings: Radius: 4.


Step 2
Go to Filter > Filter Gallery > Accented Edges. Use the following settings: Edge Width: 7; Edge Brightness: 28; Smoothness: 5.


Step 3
Go to Filter > Filter Gallery > Underpainting. Use the following settings: Brush Size: 2; Texture Coverage: 2; Scaling: 100%; Relief: 4.


Step 4
Go to Filter > Filter Gallery > Dry Brush. Use the following settings: Brush Size: 2; Brush Detail: 10; Texture: 2.


Step 5
Go to Filter > Filter Gallery > Cutout. Use the following settings: Number of levels: 8; Edge Simplicity: 0; Edge Fidelity: 2.


Step 6
Double-click on the settings icon near to the cutout filter in the Layers panel and change the Blending Mode of the filter to Soft Light.


As you can see, some of our photo's details are lost after processing the image with filters. The pupils became poorly discernible; to fix this, we will need to create an overlay.


Step 7
Create a duplicate of your smart object using Right-Click > Duplicate.


Step 8
Now we need to clear our overlay from smart filters. Right-Click > Clear Smart Filter on the second smart object.


Step 9
Go to Image > Adjustments > Shadows/Highlights and use the following settings: Shadows Amount: 100%; Highlights Amount: 0%.


Step 10
Go to Filter > Other
> High Pass and set the following settings: Radius:
9.0 px.


Step 11
Change the Blending Mode of the overlay to Linear Light and Opacity to 35%.


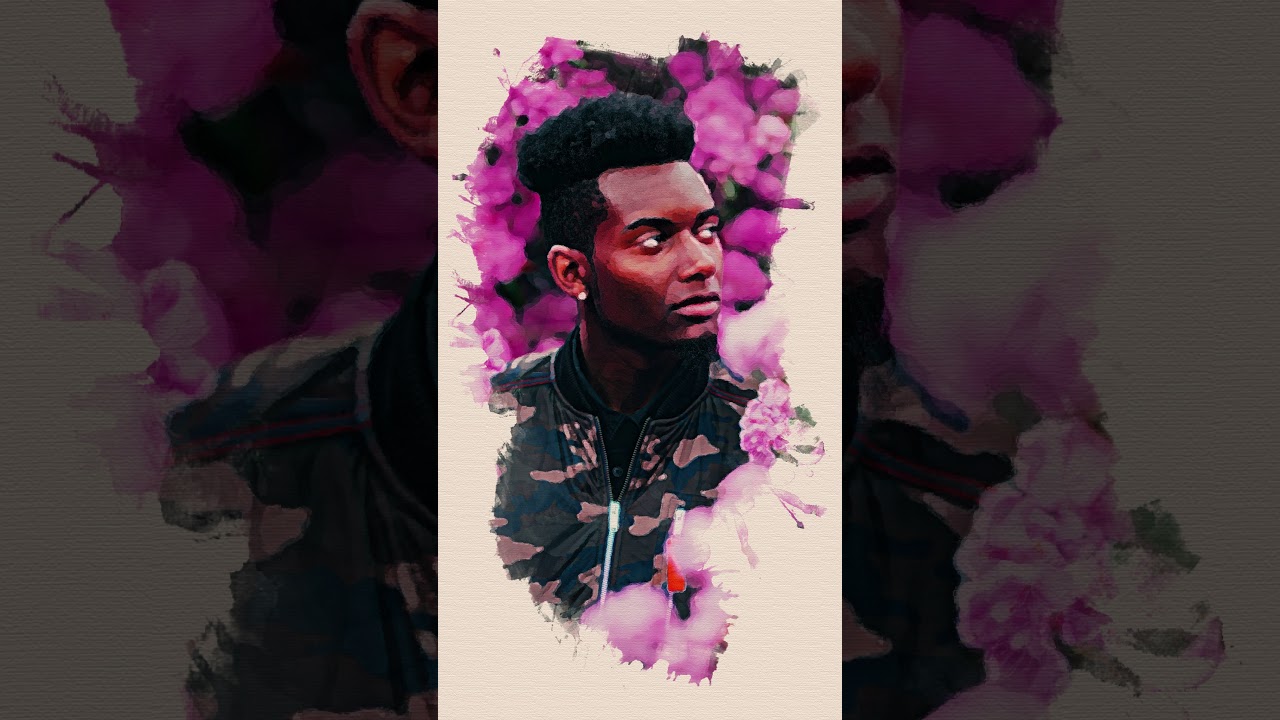
This is how our image will look after implementing all the manipulations listed above:
.jpg)
.jpg)
.jpg)
3. How to Create Masking Strokes
Step 1
Right-Click on the overlay layer and select Clipping Mask.


Step 2
After that, Right-Click on the main smart object and select Clipping Mask again.


Step 3
Now let's draw strokes with our free brushes set. Select the first layer in the "mask layers" group, and then click B to activate Brush Tool and draw a stroke with the first brush from the set.


Step 4
Draw one stroke on each layer using different brushes.


Step 5
Now, we need to create some texture for the background.
Select the background layer and use the Shift-F5 combination, and then select the #ecdccb color in the Color Picker panel.


Step 6
Go to Filter > Filter Gallery > Texturizer. Use the following settings: Scaling: 100%; Relief: 2.


Step 7
Change the Blending Mode of the layer mask group to Multiply.


4. How to Create an Animation
Step 1
Select all the masking layers while holding Shift, and change the Opacity to 0%.


Step 2
Now we are ready to start creating our animation. Go to Window > Timeline and click on Create Video Timeline.


Step 3
Open the first layer in the Timeline panel and move the Time Indicator to 0:00:00:00.


Step 4
Now you need to create the first keyframe. Click on the Timer icon near the Opacity to create the first Keyframe.


Step 5
Move the Time Indicator to 0:00:00:13 and then change the Opacity of the layer to 100%.


Step 6
Select the keyframes you created, and then Right-Click and select Copy.


Step 7
Move the Time
Indicator to 0:00:00:07 and create the first Keyframe.


Step 8
Right-Click on the Keyframe and then select Paste.


Step 9
Now, we need to Copy and Paste keyframes the same way we did above for all the mask layers.


Step 10
Move the Time Indicator to 0:00:02:22 and create a new Keyframe.


Step 11
Move the Time Indicator to 0:00:03:07 and then change the Opacity of the layer to 0%.


Step 12
Move the Time Indicator to 0:00:00:07 and create the first Keyframe.


Step 13
Go to Layer 7 in the Timeline Panel and move the Time Indicator to 0:00:02:29, and then Paste your keyframes.


Step 14
We now need to Copy and Paste keyframes the same way we did above for all the mask layers, so that we create a fade animation.


5. How to Render the Animation for Instagram Stories
Step 1
Our animation is now ready to render. Click on the icon in the upper right corner and then select Render Video.


Step 2
Set the following settings in the Render Video panel: Format: H.264; Size: Document Size; Range: All Frames.


Awesome Work, You're Now Done!
Your video is ready to be uploaded to your Instagram stories! In this manner, we can create an animated photo reveal effect in Adobe Photoshop using smart objects.
I hope you enjoyed this
tutorial; please feel free to contact me for any help with the techniques we covered. You
can also check my Animated
Creative Portrait Reveal Stories Template in my portfolio on GraphicRiver.


